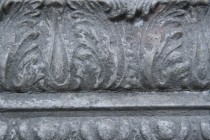
Learn how to recreate the look of an antique finish resulting from years of layered paint colors and wear. Customize your own combinations and use your imagination to layer colors and pulled finishes using Amy Howard at Home® Cracked Patina finish.
9 Steps
How to Use Amy Howard at Home Cracked Patina
1. Clean
Start with a clean surface. Simply wipe it down with a degreaser and a damp rag. Let piece dry entirely.
Step 1 of 9
2. Apply One Step Paint
Apply first color of One Step chalk-based paint. Let it dry for 20 to 30 minutes. The best final finish is produced by using a lighter color as your first coat.
Step 2 of 9
3. Apply Cracked Patina
Apply a uniform coat of Cracked Patina to entire piece, especially to carvings, crevices and ridges. Lit it dry for 1 hour. The more patina you apply, the more crackled your piece will become. TIP! If working on large flat surface, it's quicker to apply with a roller brush.
Step 3 of 9
4. Apply Second Color Coat
Apply your next color of One Step paint over the Cracked Patina. Apply this coat quickly as the crackling effect will begin to occur within minutes. Apply in long, concise applications painting with the grain. You can do this process in sections as paint must be slightly wet to create texture in the next step. But don’t overlap the application of paint, or you'll run into ‘double processing’
Step 4 of 9
5. Let Dry and Drag Brush
Watch closely and allow to dry for 2 to 3 minutes. Lay your clean brush flat and lightly and deliberately drag across your piece. This will get your paint moving and texturizing.
Step 5 of 9
6. Pull and Move Paint
While your paint is still tacky, use the palm of your hands to further pull and move the paint for your desired finish. This will create even more depth and texture.
Step 6 of 9
7. Let it Dry
After your piece has dried for an hour, you can repeat this process as many times as you wish to create your desired cracked, layered and dimensional finish.
Step 7 of 9
8. Seal with Wax
We recommend sealing your piece with Amy Howard at Home Light Antique Wax. Create a more antique finish by referring to the Amy Howard at Home Dust of Ages and Waxes step-by-steps and videos.
Step 8 of 9
9. Enjoy the Bragging Rights
Take a moment, take a step back and enjoy your work of art and Enjoy the Bragging Rights.™
Step 9 of 9

