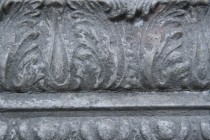
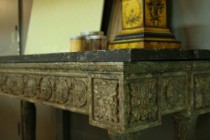
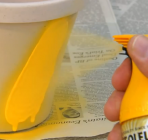
Amy Howard At Home® Waxes can be used to create a soft, satin patina, not to seal paint. Amy Howard At Home® Dust of Ages™ is a special detail that makes Amy Howard finishes authentic and unique. This powder aids in polishing wax topcoats to a subtle sheen and settles into crevices as if collected over hundreds of years. Follow these instructions after painting your piece with One Step chalk-based paint.
14 Steps
How to use Amy Howard at Home Dust of Ages and Waxes
1. Dip Brush into Light Wax
Dip a clean brush into the Light Antique Wax. You want just enough product to gently cover the bristle tips of your brush.
Step 1 of 14
2. Off-load Light Wax onto Palette
Use a piece of a cardboard palette to ‘off-load’ some wax from your brush. You don't want your brush bristles to be filled with the wax.
Step 2 of 14
3. Apply Light Wax
Use your brush to cover your entire piece with this wax. Don't neglect carvings and crevices. This consistent application is necessary to ensure that Dust of Ages will adhere to your piece.
Step 3 of 14
4. Allow Light Wax to Dry
Allow your wax to dry to a tacky consistency - about 15 minutes. The heavier the coat the longer the necessary dry time.
Step 4 of 14
5. Dip Brush Lightly into Dark Wax
Take another brush and dip it lightly into the Dark Wax. Again, you do not want to overwhelm your brush with the wax. A little dab will be sufficient. Never apply Dark Wax alone. Only use it over Light Antique Wax or you'll ruin your finish.
Step 5 of 14
6. Off-load Dark Wax onto Palette
Use your cardboard to off-load your brush of the excess wax. You don;t want your Dark Wax to be applied too heavy-handedly
Step 6 of 14
7. Lightly Brush Dark Wax onto Piece
Lightly brush over your piece on places where it would become naturally worn, like on the edges of the trim, the crevices of a cabinet door and any raised details. Don't cover every inch of your piece with the dark wax. Apply it deliberately and sparingly - as more of a detail enhancer.
Step 7 of 14
8. Allow Dark Wax to Dry
Allow your Dark Wax to dry to a tacky consistency.
Step 8 of 14
9. Apply Dust of Ages
Use the Dust of Ages to cover your entire piece, pay specific attention to the crevices and ridges. This will give your piece age and character.
Step 9 of 14
10. Bring Out Details
Use a dry brush to ‘pounce or push’ the Dust into the corners, ridges and crevices.
Step 10 of 14
11. Brush off excess
Brush the excess Dust off your piece. You can put the excess right back into the container. It can be reused and saved for later.
Step 11 of 14
12. Rag Buff
Allow wax to dry one hour before buffing. Now, use your rag to buff your piece deliberately to get desired patina shine. This buffing will allow your piece to have that authentic aged look. The more you buff the more the piece will shine.
Step 12 of 14
13. Enjoy the Bragging Rights
Take a moment, step back and Enjoy the Bragging Rights!™
Step 13 of 14
14. HELPFUL TIP
Dust of Ages is best used on pieces with carved areas. It doesn't show up well on flat smooth surfaces.
Step 14 of 14


